Removing Limescale from Bathroom Tiles and Taps
Have you ever had white spots on the taps, tiles or shower places that are difficult to clean off? The limescale is prevalent when the water contains minerals that accumulate with time. It is not good to leave it behind and move on to create an impression that the bathroom is not taken care of and you may not get a full security deposit.
With proper procedures and application of safe and workable solutions, you can bring the shine back to your bathroom fittings without having to harm them. This manual shows how to rest luster in step by step instructions, tips on practical use, and professional cleaning concepts. These practices will make your bathroom clean, fresh, and appealing to the next users.
1. Find Problem Areas
Look in all the places of the bathroom where water touches surfaces frequently. There are deposits that are visible on faucets, tiles, sinks, and showerheads. The detection of these areas assists in identifying the most infected areas. Corners and concealed edges are prone to being overlooked yet might conceal a layer of limescale. The awareness of where the buildup is will be a surety of the right solution taken. Preventive measures will save time down the line through early detection. Looking at each surface thoroughly and indicating where stubborn deposits might need additional consideration. Professional bond cleaners follow the same detailed approach to ensure no area is missed. Cleaning in these areas is time- and energy-saving.
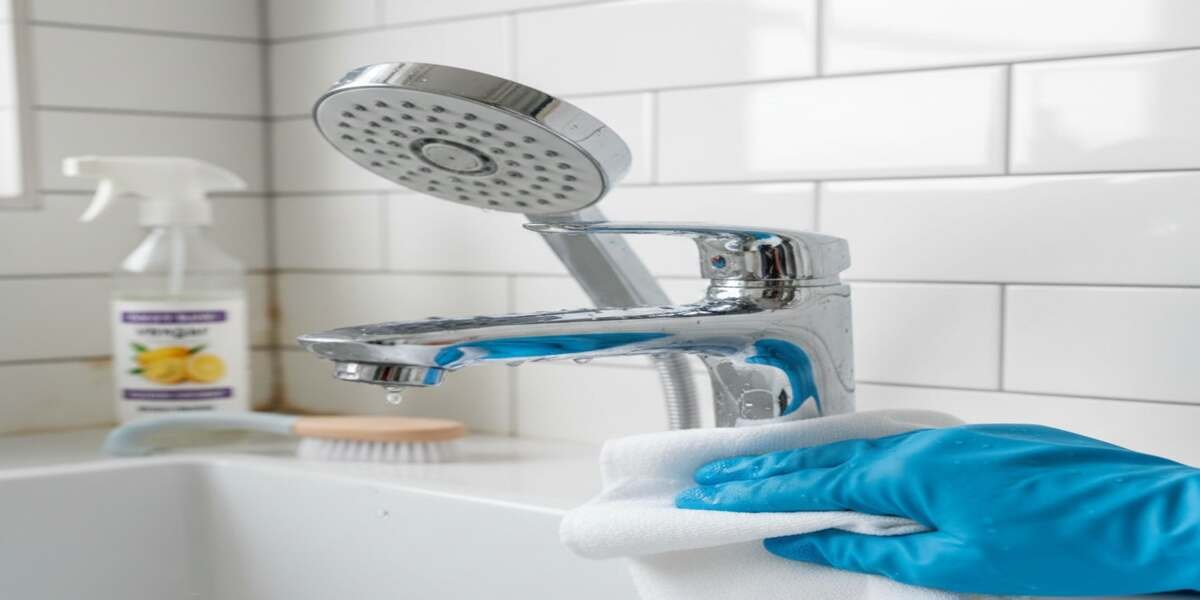
2. Scrub Gently
After softened you may scrub the surface using a soft brush or sponge. Do not use metal pads that scratch tiles or faucets. Clean gradually, bit by bit, to provide even results. Soft scrubbing does not harm the finishes and the residue is removed. Scrubbing should be used together with mild solutions. Wipe surfaces subsequently to take off loose particles. The natural shine is achieved by consistent light scrubbing. Faucets, tiles and shower areas can be done with small circular movements. Wipe down to avoid streaks or scratches.
3. Clean Tiles and Walls
Do not use extreme chemicals that may discolour grout. Pay attention to the edges, corners, and vertical surfaces, and consider them entirely.
- Globules of mineral buildup are easily noticeable on tiles and grout lines.
- Cleanse weak solution around grout lines and corners.
- Allow to dry and then wipe lightly using a soft brush.
The regular care will stop thick deposits that are hard to clear. Clean tiles would enhance hygiene and cleanliness and make the bathroom appear well maintained. Cleaning tiles well beforehand can give one a smooth surface that has no streaks. This measure improves the general look prior to the act of departing.
4. Rinse and Dry Surfaces
Rinse all the places with water to cleanse them. Clean surfaces using a dry soft cloth. Drying stops watermarks and new minerals. Pay attention to corners, edges, and metal components to prevent damage from moisture. A dry and clean bathroom appears clean and inviting. Regular rinsing also saves finishes and extends the life of faucets and tiles. Final drying will make all surfaces shine. Routine after maintenance minimizes effort in the future. It also prepares the bathroom to be inspected.
Conclusion
It can be difficult to remove the limescale before moving out, but with realistic action and expert cleaning, it is not a hard task. Begin by finding the areas of concern and watching the hidden places. Washing down with weak solutions, such as vinegar, will not scratch tiles or fittings. Soft scrubbing will not remove finishes and deposits. Important fittings such as taps and showerheads should be given special care in terms of the correct flow of water and sanitation.
Cleaning of tiles and grout lines should be done with care in order to prevent discoloration. Washing and drying will keep the surfaces fresh and will prevent the new accumulation. At the same time, do not forget to clean your garage by removing unwanted items, sweeping dust and debris, and organizing stored belongings to leave the entire property in good condition. Following these steps leaves your bathroom clean and ready, reducing hassle and worry.